How to Plan Plaque Mounting Before Choosing Its Size
Quick answer: Decide the plaque’s exact display position and mounting method before choosing its finished size. Record the available width and height, wall or tabletop construction, viewing distance, nearby obstructions, and proposed fixing points. Then test a full-size paper template and have the final mounting plan checked for the actual surface.
A sound commemorative plaque mounting size decision joins visual scale with physical installation. The Custom Club Commemorative Plaques buying guide covers the complete order; this guide prevents the common mistake of selecting dimensions from a product image before the display has been measured.
Photograph and measure the intended position
Take one straight-on photograph and at least one wider photograph showing the plaque area in context. Record available width and height, trim or shelf boundaries, switches, vents, doors, neighboring displays, and the normal line of sight. For a tabletop display, record the usable surface depth, overhead clearance, traffic around the surface, and whether the back will be visible.
Include a known-size reference in the site photograph or attach a simple measured sketch. A photograph alone can distort scale; a measurement list alone can omit a real obstruction.

Agree on mounting or support before the dimensions
| Display route | Information to confirm | Effect on size approval |
|---|---|---|
| Wall-mounted | Surface construction, supplied mounting back, fixing positions, projection, weight | Requires edge clearance and verified anchor locations |
| Tabletop stand | Stand footprint, angle, center of gravity, plaque thickness, surface depth | Requires enough base area and overhead clearance |
| Recess or display case | Opening, internal depth, access, lighting, ventilation | Requires tolerance around every edge and projection |
Ask what mount, stand, or back is included with the quoted plaque and obtain a drawing where available. Do not assume a mounting method shown on one construction transfers to another. A dimensional plaque may have different projection, mass, and fixing geometry from a flat printed piece.

Test the proposed size at full scale
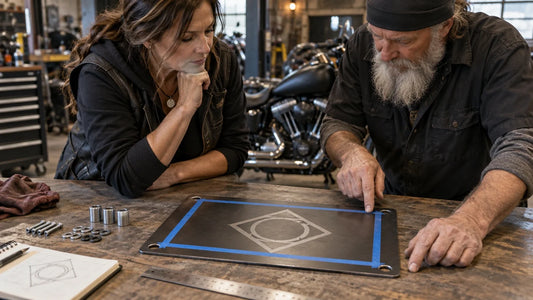
Print or assemble a paper template at the proposed finished dimensions. Mark the plaque outline, artwork boundary, inscription lines, and proposed mounting points. Position it at the intended height, then view it from the normal standing or seated location and under the actual lighting. Check nearby doors and traffic paths.
For a tabletop display, make a simple thickness and stand-footprint mockup as well. A front outline cannot reveal whether the support consumes too much depth or whether the plaque is stable on the available surface.

Transfer the approved display plan to the proof
The production proof should state finished width and height, thickness or depth where relevant, orientation, mounting-back type, fixing-point locations if defined, safe artwork area, and the approved artwork revision. Tie it to the site photograph or location identifier. If the merchant changes construction, size, or mounting after the test, repeat the template check.
Installation requirements vary by surface, hardware, plaque weight, and local conditions. Ask the product supplier what is included and consult a qualified installer or responsible facilities professional for substrate-specific anchors and installation. Do not generalize an indoor method to an exposed outdoor position.
Resolve a size conflict before approval
If the preferred plaque is too large for the measured envelope, identify which requirement can change: location, support method, inscription length, artwork hierarchy, or construction. Do not trim margins, shift holes, or shrink lettering informally. Return the revised choice to the artwork owner, supplier, and installer as applicable, produce a new dimensioned proof, and repeat the full-size test. Record why the change was made so a later organizer does not revive the rejected dimensions.
For several plaques in one program, assign a location identifier to each display and match it to the corresponding proof. Similar-looking walls can have different clearances or support conditions, so one site check should not automatically approve every position.
Frequently asked questions
Can we choose plaque size from a mockup?
No. A mockup does not establish the real wall area, viewing position, mounting clearances, or tabletop footprint.
What measurements should a wall display include?
Record available width and height, obstructions, intended center position, wall construction, nearby edges, viewing distance, and proposed fixing area.
Why use a full-size paper template?
It reveals actual scale, line hierarchy, lighting, traffic conflicts, and mounting-point relationships before material is committed.
Is supplied hardware automatically right for every wall?
No. The supplier can identify included hardware, but a qualified installer should determine suitability for the actual surface and conditions.
Should an outdoor location use the same plan as an indoor wall?
No. Obtain documented material, finish, mounting, and installation guidance for the exact exposure.
Request a plaque size and mounting review
Send your authorized artwork, quantities and completed measurement or sample checklist to request a design and quote review for commemorative plaques.
Explore Custom Commemorative Plaques
Confirm product specifications and consult a qualified installer for the actual mounting surface.
Tags:
Previous
How to Proof Names and Dates on a Club Commemorative Plaque
Next
How to Proof Names and Dates on a Club Commemorative Plaque
Related articles





How to Prepare a Club Decal for a Curved Surface
Sep 17 2026