Motorcycle Vest Patch Placement and Permission: How to Measure the Back Panel
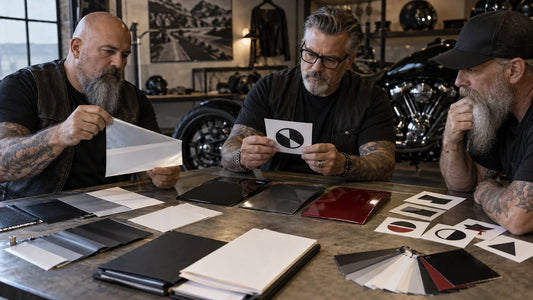
Quick answer: Check permission first with the club or artwork owner, then measure the actual unworn vest—not the garment size label. Lay it flat, record the usable back-panel width and height inside seams, vents, pockets and access openings, place full-size paper patch templates on that usable area, and save a dated photograph of the approved arrangement. A supplier should confirm the final dimensions from those records before producing a sew-out or order.
How to measure vest back panel for patches after authorization
A back patch can represent membership, service, a riding organization or a personal design. That context matters. Do not copy another club’s mark, wording or arrangement, and do not assume that a layout seen online is available for your use. The club, chapter or artwork owner should identify who is authorized to submit the artwork and who can approve the finished layout.
The useful point retained from the existing article is simple: club patches carry meaning beyond decoration, so authorization and respectful handling belong at the beginning of the process. This guide does not create a universal placement rule. Club practices and local context differ. It gives an organizer a reliable way to document the space available after the appropriate owner has approved the intended components.
Use the real vest model and size that will receive the patches. Two garments with the same printed size can have different yokes, seams, vents, lacing or pockets. If the order covers several vest models, measure one representative vest from each model and size group instead of treating the largest garment as the standard.
Record usable width, height, seams and access panels
Close the vest as it would normally be worn, then lay it back-side up on a smooth table. Do not stretch the leather or denim. Smooth only obvious folds. Photograph the whole back before adding a tape or template so the supplier can see the construction.
- Define the upper and lower limits. Mark the first uninterrupted line below the collar or shoulder yoke and the last usable line above the hem, vent or lower seam.
- Define the side limits. Mark the usable area inside vertical seams, lacing, arm openings and side panels. Keep the tape on the same plane as the vest rather than pulling it across a curve.
- Record width and height with units. Take both a straight horizontal measurement and a straight vertical measurement. If the panel narrows, record more than one width and show where each was taken.
- Mark every obstruction. Outline pockets, access zippers, vents, decorative seams, existing patches and areas a tailor must still reach.
- Add a scale reference. Include a ruler or tape in each close photograph. Do not rely on a perspective photo without a known scale.

Create a small measurement table for each representative vest:
| Record | What to enter | Evidence |
|---|---|---|
| Vest reference | Model, labeled size and sample ID | Full-back photograph |
| Usable panel | Width × height, with units | Dimensioned photographs |
| Obstructions | Seams, pockets, vents, lacing, existing pieces | Marked close-ups |
| Authorized layout | Center, top and bottom components intended | Full-size paper template photo |
Lay the unworn vest flat and mark obstructions
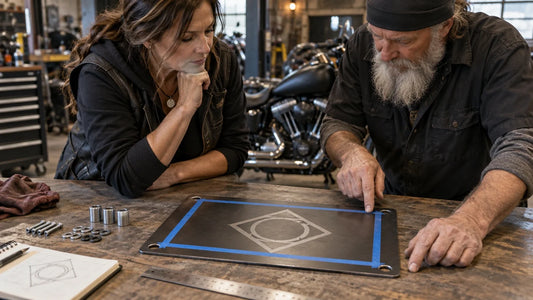
Cut paper templates at the proposed finished outline. A screen mockup is useful for discussion, but a full-size physical template answers a different question: does the layout fit the real vest without crossing construction details or blocking access?
Place the center template first. Then add only the top, bottom or side pieces that the authorized layout requires. Check the clearance between every component and from each component to a seam or opening. Pin paper only where doing so will not damage the garment; low-tack tape should likewise be tested on a hidden area. When in doubt, hold the pieces in position for the photograph rather than attaching them.

Look at the vest flat and on the intended wearer. The flat check protects the pattern dimensions; the worn check reveals how the garment hangs. If different vest samples produce materially different usable areas, do not force one oversized layout across the group. Ask the supplier whether separate size groups or a smaller common layout is more appropriate.
Check the result before approving the proof
Do not infer panel space from garment size. Approve the outline only after the supplier has received the dimensioned vest photographs and full-size template evidence. The artwork proof should identify the finished outline, orientation and each component separately. A beautiful illustration at an unspecified scale is not a fit approval.
Also keep permission evidence with the technical proof. Record the authorized artwork revision, the person who approved the arrangement and the date. If wording, chapter identification or component count changes, treat it as a new revision. Do not let a vendor add titles, place names, years or symbols during cleanup without explicit approval.
For the wider choice between a center patch, replacement rockers and a coordinated set, use the Custom Back Patches and Rockers buying guide. This page stays focused on permission and vest-panel measurement.
Save the approved layout as a reusable record
The accepted record should contain the vest sample ID; model and labeled size; usable width and height with units; dimensioned seam and access-panel photographs; paper-template file or outline; authorized artwork revision; proof or sample ID; approver; and approval date. Name files consistently so the club can retrieve the evidence during a reorder.
A corrected example might read: “The first paper outline crossed the right pocket access. The center template was reduced and moved within the usable panel. The organizer photographed the revised spacing on the same vest sample, and the named layout approver accepted that photograph with artwork revision B.” The important acceptance test is not the reduction itself; it is that the revised outline fits the measured panel and the approval record identifies what changed.

Send the completed checks for a custom-order review
Send the usable panel width and height, seam and access-panel photographs, approved center/rocker layout, authorized original artwork, intended quantity, vest sample references and the responsible approver. Ask the merchant to confirm the required full-size template, actual stitch-out, thread references, edge and backing details, and current production terms in writing.
Review the current Custom Back Patches ordering destination. If the project needs a separate top or bottom text arc, also review Top & Bottom Rockers. A design review or quotation is not production approval.
Send Your Authorized Back-Patch Checklist for Review
CTA: Send your authorized artwork, quantities and completed measurement or sample checklist to request a design and quote review for custom back patches.
Frequently asked questions
How do I measure a vest back panel for patches?
Lay the actual vest flat without stretching it. Measure the uninterrupted width and height inside seams, pockets, vents and access openings, state the units, and include dimensioned photographs plus a full-size paper layout.
Can I use the vest’s labeled size to choose a back patch?
No. A garment label describes body sizing, not the shape or uninterrupted area of the back panel. Measure representative garments from the intended order.
Who decides motorcycle vest patch placement?
The relevant club, chapter or artwork owner should authorize the intended mark and layout. There is no single universal placement rule that this measurement process can replace.
Why use a full-size paper patch template?
It exposes conflicts with seams, pockets, vents and other components at actual scale before the supplier makes a sample.
What should I send with a back-patch quote request?
Send authorized artwork, quantities, usable panel measurements with units, dimensioned vest photographs, the approved component layout, vest sample IDs, artwork revision and approver.
Tags:
Previous
Express Your Identity with Biker Vest Patches: Best Placements for a Personalized Look
Next
Unveiling the Power of Motorcycle Club Patches: Emblems of Honor and Belonging
Related articles
How to Prepare a Club Decal for a Curved Surface
Sep 17 2026