Motorcycle Lighting Installation: Parts and Tools Checklist
Prepare a motorcycle-lighting installation by confirming the exact model-year fitment, selected light or component, mounting location, included parts, connector and controller requirements, power demand, wire-routing path and final test plan. Gather only the tools named by the current product and motorcycle instructions; do not cut factory wiring or choose fuse sizes by guesswork.
Safety note: Disconnect and reconnect electrical power only as directed by the motorcycle service information. Lighting affects visibility and may be regulated. Use a qualified motorcycle technician when the instructions, wiring, load management, waterproofing or road-use requirements are uncertain.
Start with the exact selected option
A product page can combine complete lamps, brackets, lenses, harnesses, controllers and resistors. Record the selected option or part number before making a parts list. Confirm whether the option is a complete assembly or one component in a larger system.

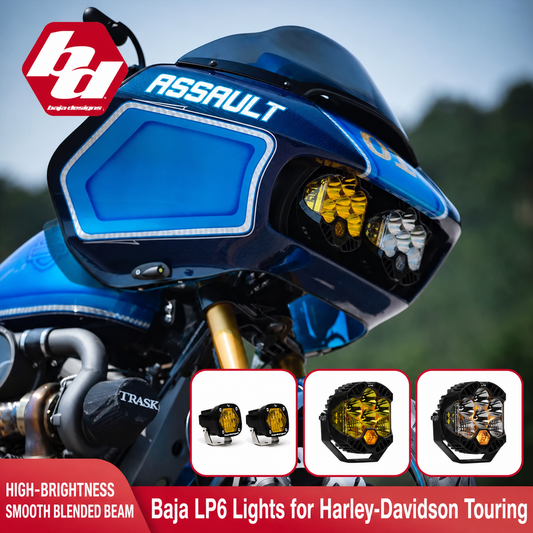
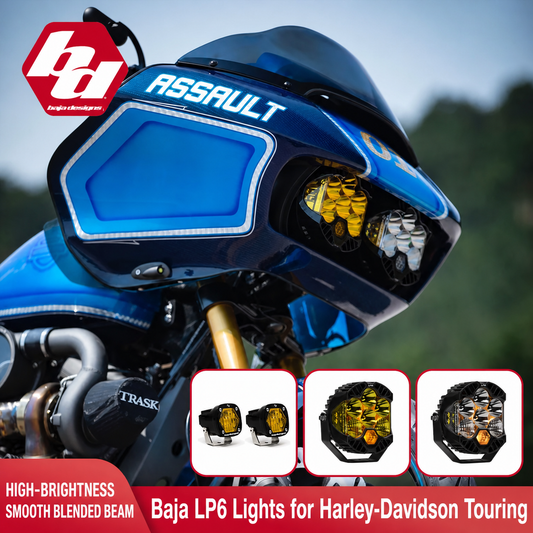
This modular Baja-style range includes headlights, auxiliary lights, brackets, a cover plate and wiring accessories. Build the checklist around the exact selected component rather than the main listing image.
Parts checklist before the motorcycle is opened
- The exact lamp, light strip or lighting module selected.
- Application-specific bracket, clamp, bolts, spacers and vibration-isolating pieces named by the instructions.
- Correct harness, adapters, connectors, controller, switch, relay or load-management part when required.
- Specified fuse and fuse holder only when the product instructions call for them.
- Approved wire protection, clips and ties for the planned route.
- Seals, grommets or weatherproof connector parts supplied or specified for the installation.
- Current motorcycle service information and the product installation instructions.

These leg-guard lights combine running-light and turn-signal functions and are supplied as a pair with wiring. Confirm the motorcycle, guard or lower-fairing configuration, connector and mounting space before beginning.
Do a complete package inventory
Lay out every supplied part on a clean bench and compare it with the manufacturer’s parts diagram. Separate left and right pieces and label adapters before disassembly. Stop if a required bracket, harness, fastener or controller is missing.
Do not infer package contents from a lifestyle photo. The selected option name and current product description control what is included.

The DENALI range contains lights, replacement lenses, controllers, switches, wiring and mounts sold individually. It is a clear example of why every installation needs an option-by-option component inventory.
Tools checklist
The exact tool list depends on the motorcycle and selected kit. Common preparation items may include the correct metric or SAE sockets and hex keys, manufacturer-specified torque wrench, non-marring trim tools, flashlight, measuring tape or caliper, multimeter used by a competent installer, wire-label tags and clean protective covers. Use specialty crimping or terminal tools only when the instructions specify the exact terminal system.
A test light, drill, tap, soldering iron, wire cutter or heat source should never be treated as automatically required. Do not drill, splice or alter a harness unless the approved instructions explicitly call for it.

This modular RGB system uses lighting zones and controller-dependent configurations. Confirm the chosen zone, controller, fork hardware and application-specific wiring before selecting tools or routing cables.
Map the electrical connection before touching wiring
- Identify the supported light function: headlight, running, turn, brake or accent.
- Confirm system voltage, connector, polarity and controller or resistor requirements.
- Locate the approved connection point in current instructions.
- Check whether the motorcycle monitors lamp load or uses a data-bus controller.
- Confirm circuit capacity and fuse guidance from authoritative documentation.
- Plan a reversible test before final cable securing and reassembly.
Wire color alone is not proof of function. Never probe, splice or energize an uncertain circuit.

These low-profile handlebar turn signals have model- and part-number-specific options, and one option is a load resistor rather than a signal pair. Verify the selection before building the electrical checklist.
Plan mounting, clearance and wire routing
Before removing panels, trace the full route from the light to its connection point. Check steering from lock to lock, suspension movement, luggage clearance and nearby engine or exhaust heat. Wiring must not be stretched, pinched, sharply bent or able to rub on an edge.
Measure bracket and housing clearance with the motorcycle safely supported. Confirm that the installed light will not be blocked by fairings, guards, saddlebags or accessories.

These saddlebag lights combine running, turn and brake functions and use year-specific variants. Match the exact model year, lens option, connector and supplied harness before panel removal.
Pre-installation worksheet
| Item | What to record |
|---|---|
| Motorcycle | Make, model, year, trim and relevant fairing, fork, guard or luggage setup |
| Selected option | Exact part number, finish, lens and light function |
| Included parts | Lamp, bracket, hardware, harness, controller, switch and adapters actually supplied |
| Additional parts | Only components explicitly required by current instructions |
| Tools | Exact sizes and specialty tools named by service and product instructions |
| Electrical plan | Connection point, connector, voltage, load management, controller and fuse guidance |
| Route | Clearance through steering and suspension travel; heat and abrasion protection |
| Final test | Every supported function, warning indicator, fastener check and road-use compliance |
Final checks before reassembly
- Test every supported function independently.
- Confirm there are no warning indicators or abnormal flash behavior.
- Inspect cable slack through full steering movement.
- Verify fastener torque using the applicable specification.
- Check that seals and panels are seated correctly.
- Confirm required original lighting remains visible and operational.
- Reinspect routing and fasteners after the initial ride when the instructions require it.
Frequently asked questions
Does every lighting kit include a wiring harness?
No. Some options are individual lights, lenses, brackets, controllers or resistors. Verify the exact selected option.
Can I choose tools before checking fitment?
No. Tool sizes, access steps and specialty tools depend on the motorcycle and selected component.
Should I splice factory wiring?
Not unless authoritative instructions explicitly require and describe it. Prefer the specified connectors and harnesses.
Can wire colors identify the right circuit?
No. Use verified wiring information, connector pinouts and test procedures.
When should a professional install the lights?
Use a qualified technician whenever fitment, circuit capacity, controller requirements, waterproofing, routing or compliance is uncertain.
Product configurations and availability verified against active Motor Club Shop listings on September 12, 2026. Current product pages, manufacturer instructions, motorcycle service information and applicable law remain the final references.
Tags:
Related articles


How to Choose Biker Earrings as a Gift
Sep 13 2026
How to Inspect and Maintain Motorcycle Lighting
Sep 13 2026