How to Choose a Rug Size for the Actual Clubhouse Floor
Quick answer: For a dependable clubhouse rug size floor plan, measure the clear floor—not the wall-to-wall room—then mark the proposed rug outline at full size. Open every nearby door, trace the walking and access routes, and check furniture in its normal position. Send those recorded dimensions and photos to the supplier; do not infer non-slip behavior, floor compatibility or performance from the marked outline.
A nominal room size is rarely enough. Baseboards, thresholds, cabinets, seating, motorcycle display stands and the path members actually use can all reduce the workable footprint. The correct size is therefore the largest supplier-confirmed option that fits the measured clear area without interfering with a door, an access route or the intended furniture arrangement.
This article owns the layout check. Construction, backing, care and the wider purchasing sequence belong in the Custom Clubhouse Rugs buying guide.
How to choose a rug size for the actual clubhouse floor
Begin with a simple plan drawn from the real space. Give every dimension a unit and connect it to a labeled photo or supplier template. Record uncertainty instead of rounding it away. The supplier may offer only certain finished sizes or tolerances, so treat the measured footprint as a constraint for a quote—not a promise that a made-to-measure dimension is available.
Record clear floor dimensions, door swing, walking and access routes
- Remove only temporary objects that will also be absent in normal use; leave fixed fixtures and typical furniture in place.
- Measure the clear width and length at more than one point when walls or edges are not parallel.
- Record thresholds, floor transitions, vents, outlets, columns and other interruptions.
- Open each nearby door through its full normal travel and mark the swept area.
- Draw the routes people use to enter, reach seating, handle equipment and leave the room.
A dimension without context invites mistakes. Pair the plan with overview and close photographs that show where each measurement starts and stops. Blank tape flags or non-readable markers can identify points; the written brief should carry the verified numbers and units.

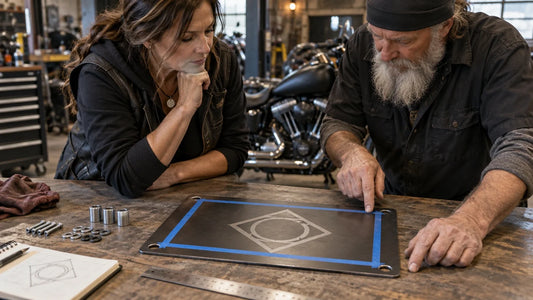
Measure the intended position with a full-size outline
Use low-residue painter’s tape, paper or another floor-appropriate temporary method only after checking that it is suitable for the surface. Mark the proposed outside edge at full size. Add a simple orientation arrow on the written plan so the artwork faces the intended approach. The outline should represent the finished footprint, not the printed artwork boundary.
Walk the route in normal clothing and with the room arranged as it will be used. Open doors, pull chairs back, access storage and check the motorcycle display or event setup if relevant. This is a geometric check, not a friction or wear test.

Check the result before approving the proof
- Do not block an exit, doorway or access path.
- Keep the proposed edge away from conflicts identified by the club’s real room use.
- Check that the emblem orientation is correct from the primary approach.
- Do not infer anti-slip, trip, abrasion, fire or outdoor performance from the room test.
- Ask the supplier to confirm available finished dimensions, edge construction and any installation or floor guidance.
Save the approved clear floor dimensions and proof version
Suppose an initial rectangle fits between two walls but a chair crosses its edge and a storage door touches the corner. The corrected layout moves the rectangle clear of both and preserves the main walkway. Acceptance is visual and measurable: every nearby door completes its travel, the normal furniture position works, and the access route remains open.

The retained record should include clear floor dimensions with units, door-swing notes, access routes, intended orientation, room photographs, sample ID, artwork revision, proof version, approver and date. Recheck the room and current supplier specification before any reorder.
Send the completed checks for a custom-order review
Send the floor plan, annotated photos, full-size outline photos, authorized original artwork, intended quantity and location. Ask for the actual pile or print sample, finished dimensions and edge details, backing and cleaning guidance, and floor compatibility. Keep anti-slip, fire, wear and outdoor claims open unless current documentation for the exact product supports them.
For the full order sequence, current option questions and approval workflow, return to the Custom Clubhouse Rugs buying guide.
Frequently asked questions
Should a clubhouse rug be sized from the room dimensions?
Use the clear usable floor area after doors, furniture, thresholds and access routes are mapped. Wall-to-wall dimensions alone are not enough.
Why mark the rug outline at full size?
It exposes conflicts with door movement, chairs, storage and walking paths before the club approves a proof or quote.
Does the taped outline test slip resistance?
No. It tests placement and clearance only. Request current product-specific backing and floor-compatibility documentation from the supplier.
What measurements belong in the saved record?
Save clear width and length with units, start and stop points, interruptions, door sweeps, access paths, orientation, photos, proof revision and approval details.
Request a design and quote review
Send your authorized artwork, quantities and completed measurement or sample checklist to request a design and quote review for custom rugs & carpets.
Explore Custom Rugs & Carpets Read the buying guide
A design inquiry is not production approval. Confirm current specifications, quote and final proof in writing.
Etiquetas:
Anterior
Printed or Tufted Clubhouse Rugs? Match the Construction to the Artwork
Siguiente
How to Keep a Club Logo Readable in a Textured Rug
Artículos relacionados



How to Prepare a Club Decal for a Curved Surface
Sep 17 2026